Organising People in Teams
A Team in Outplanr allows you to allocate Projects to specific team members, giving them access only to those projects. This is particularly handy if you wish to invite clients to overlook a specific Project, a Freelancer to collaborate on just a couple of Projects, or if you prefer to fine tune exactly what each person is able to see in the company, instead of giving access across all projects.
To create a new Team, click on the "+" button near the "People" label, on the left-hand menu.
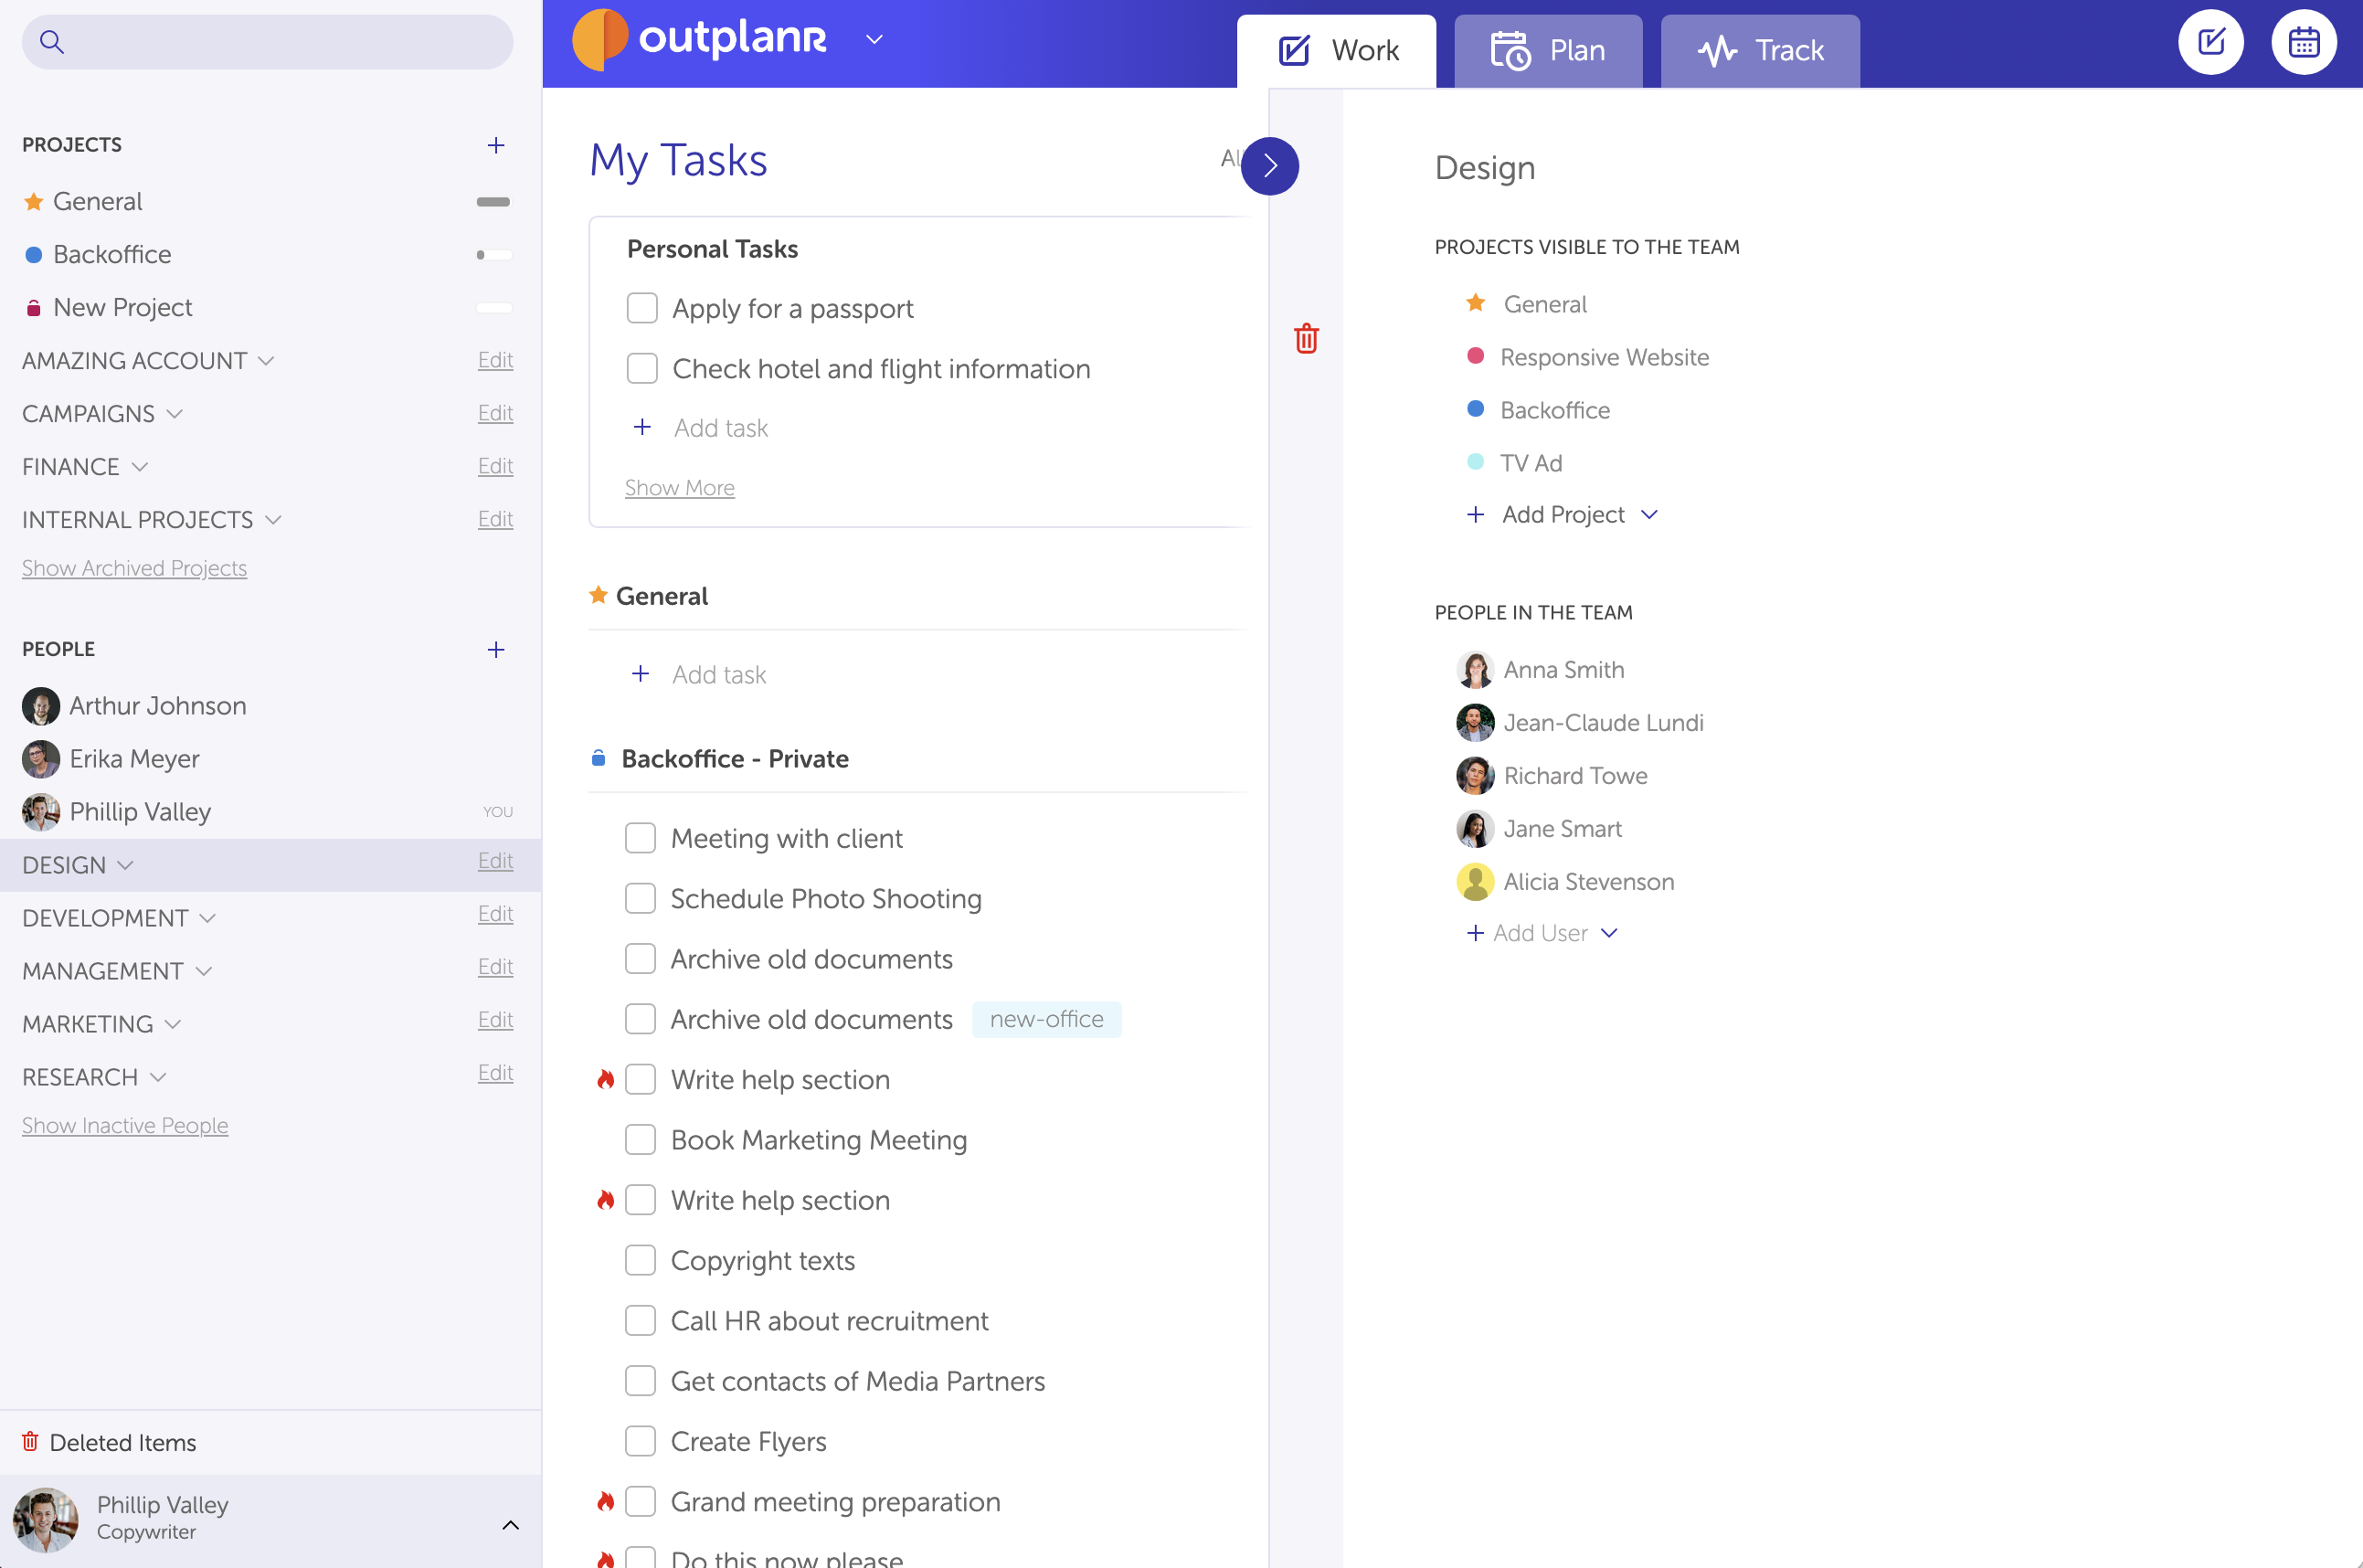
When creating a new Team, you can select which Projects will be visible to the people inside that team, and who is in this Team.
You can edit any of these details later on as well. Just head to the left-hand menu, and select "Edit" in front of the Group name.
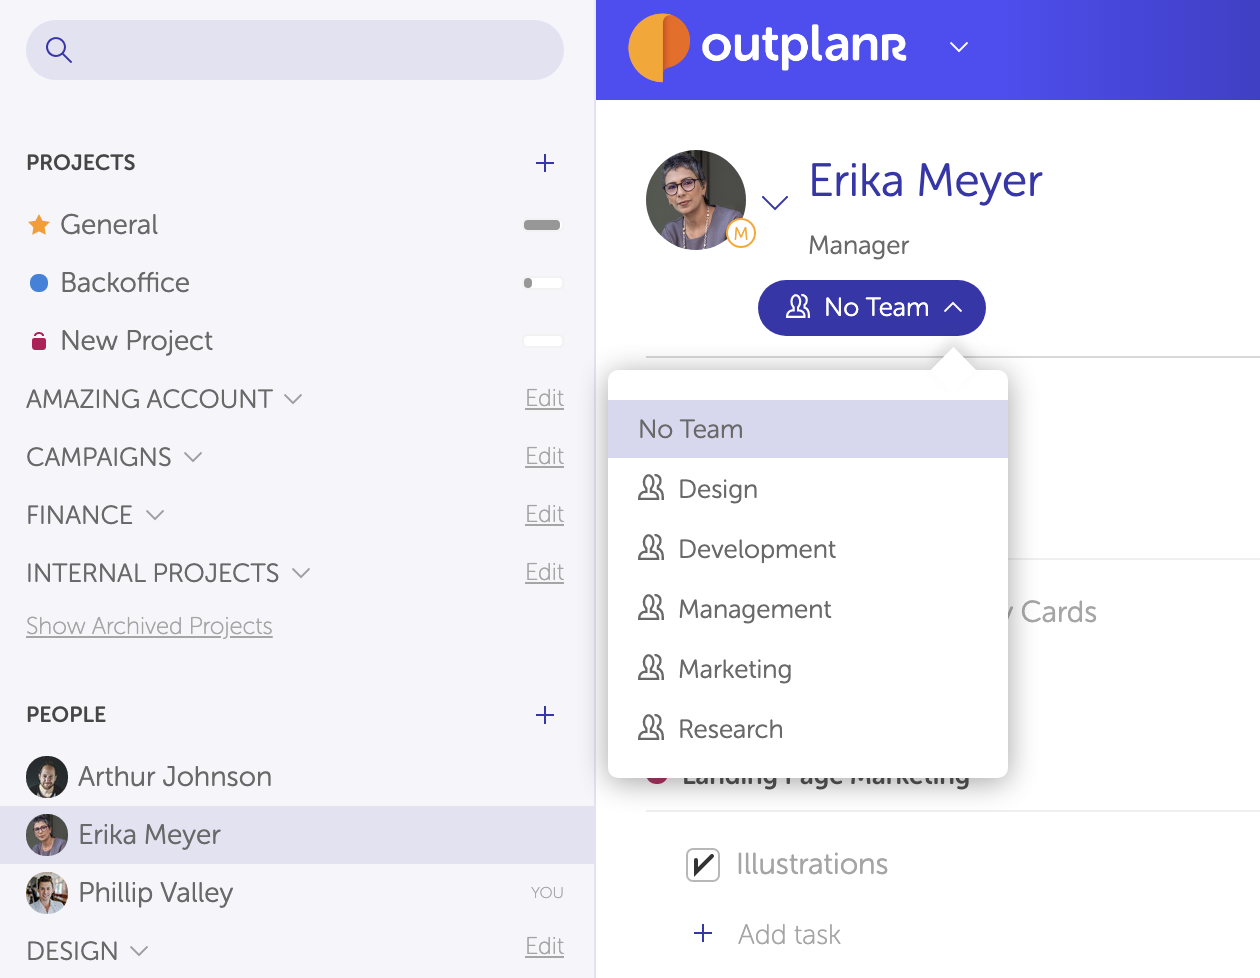
By default, any new Person added to your account will be assigned to the main Company. But you can move them to a Team anytime, by clicking on their name and selecting a Group from the dropdown, or by drag-and-drop on the left-hand menu.
See how to add people to a Team here:
If you wish to include an external guest (a Client, for example), you can assign them to a Team and set their permission level to “Standard”, so that they will only see the Projects linked with the Group they’re in.
You can add people to Groups with the following permissions:
- Manager (will be able to see all projects, even outside the group);
- Standard (will only see public projects inside the group).
To learn more about Permissions in Outplanr, check out this article.